How to mount a Dyson Airwrap i.d. on the wall
Five minutes, four screws, and the styler plus all six attachments come off the counter for good. Here's the whole install, including the one decision that matters before you drill.
What you need
- An ACBeautyGoods Airwrap i.d. wall mount. The box includes the two mount plates, the color band, the styler clamp, screws, and drywall anchors.
- A drill (or a screwdriver and some patience), a pencil, and optionally a small level.
- About five minutes.
Before you drill: horizontal or vertical?
The mount is the same part either way; it's the orientation on the wall that changes. This is the only real decision in the install, so think about it first.
| Orientation | Works best when | Clearance needed |
|---|---|---|
| Horizontal | You have wall width but not much height: under a cabinet, above a towel bar, along the side of a vanity. | About 14 in below the mount for the styler and the three lower attachments to hang. |
| Vertical | You have a narrow strip of wall: beside a mirror, inside a closet door, next to the outlet. | About 20 in of height, roughly 6 in of width. |
Either way, keep it within a cord's reach of the outlet you actually use, and avoid mounting directly above a sink where it'll get splashed every morning. PETG handles humidity fine, but the Airwrap doesn't love being dripped on.
The install
Mark the holes
Hold the plate where you want it and use the pencil to mark through the screw holes. If you're going horizontal, a level across the top of the plate saves you from a mount that looks slightly drunk forever. Vertical, plumb it against the edge of a mirror or door frame.
Drill and anchor
Drill pilot holes at your marks. If you hit a stud, skip the anchors and drive the screws straight in. On plain drywall, tap in the included anchors first. The loaded mount weighs under three pounds, so drywall anchors are plenty; you don't need to hunt for a stud.
Screw the plates to the wall
Drive the screws until the plate sits flat and doesn't rock. Don't crank them; PETG is tough but over-tightening can dimple the plate around the screw head.
Slide the band on
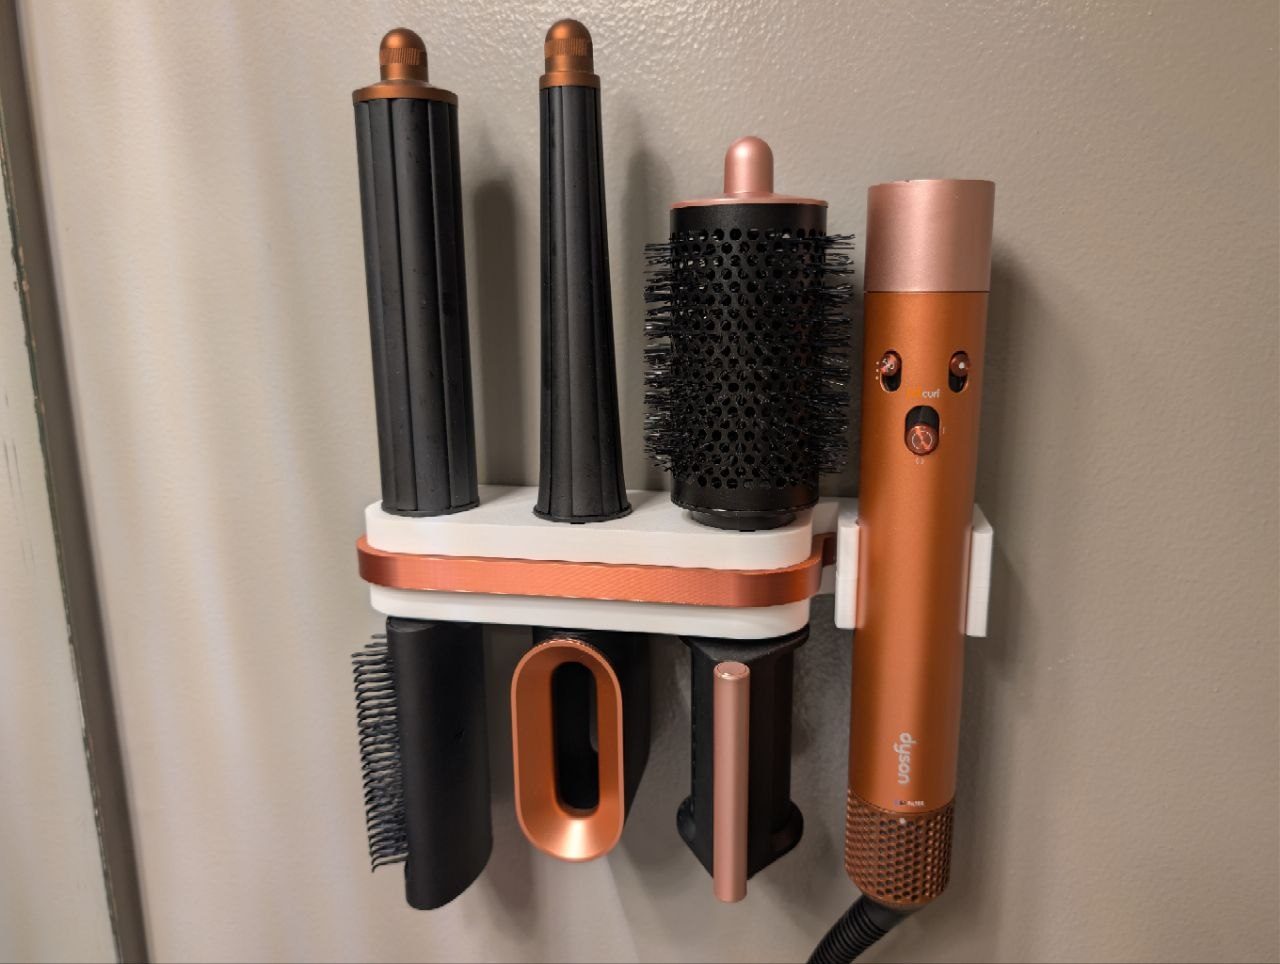
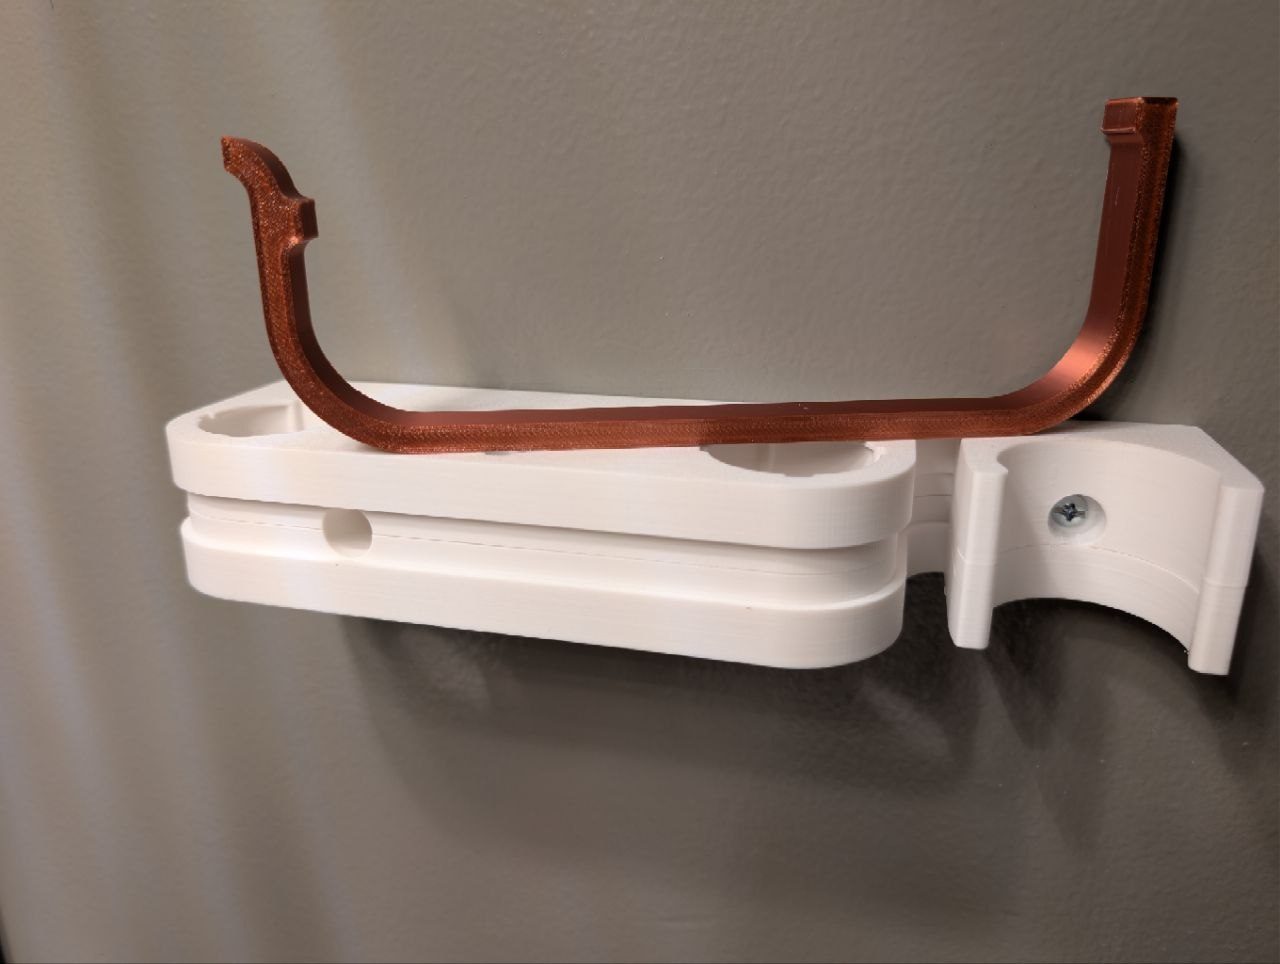
The color band wraps the outside edge of the plates and snaps into place. It's the accent ring you see in the photos, and it covers the screw heads so the finished mount has no visible hardware.
Attach the styler clamp, then load it
Clip the clamp onto the end of the mount. Set each attachment base into a holder and give it a quarter turn until it stops: that's the twist-lock. Three on top, three below. To take one off, turn it back and pull straight out. Hang the Airwrap body in the clamp, let the cord drop, and you're done.
Which attachments fit? All six standard Airwrap i.d. attachments: both barrels, the round brush, the smoothing dryer, the flyaway attachment, and the firm smoothing brush. The diffuser is too wide for the holders and is not supported. Original Airwrap and Airwrap Complete attachments have a different base and will not twist-lock.
Common questions
Will the attachments fall out?
No. The quarter-turn lock is the whole point. Each holder is shaped to the attachment base, so once it's turned it stays until you turn it back. This is the difference between this mount and a shelf or a loop holder.
Can I move it later?
Yes. Back out the four screws, patch the holes, and remount. Anchors are included for the first install; reuse the screws or pick up matching #6 anchors at any hardware store.
Does it work on tile?
It can, with tile-rated anchors and a masonry bit, but grout lines are easier: mark the holes on grout if you can. If you'd rather not drill tile at all, see the storage ideas guide for no-drill alternatives.
Get the mount
$55, free US shipping, printed to order in your choice of 15 color combinations. Ships in 3–5 business days.